So if you haven’t realized, I didn’t get around to posting this last Sunday. My week ended up being a little chaotic so blogging took a backseat. Hopefully you were able to use the extra grace week to catch up or to really get those cabinets clean!
We’ll get back on schedule this week and caught up over the next few weeks, so no worries! Now on to this week’s challenge….
This year let’s create a haven at home with the 52-week home project. Small, managable weekly tasks and challenges to create a space that promotes peace, inspires creativity, nurtures your family and is not only more organized but also runs with more purpose and intention.
To catch up on all the previous projects, head here.

Last Week’s Project
The kitchen is the heart of the home. It’s where everyone gathers to share life and where the food is made and stored. Unfortunately the kitchen can also be the biggest source of clutter in our homes. It’s easy to hide so much behind those cabinet doors and when you do open them, it’s open at your own risk!
Not to mention, the kitchen can easily be the most dirty room in our homes with all off the food and crumbs.
Rather than tackle the entire kitchen in one week, we are going to spend the next four weeks decluttering, deep cleaning and organizing the kitchen.
This week we will focus on the cabinets and drawers, next week we will tackle the kitchen counters and sinks, in two weeks we will clean out the refrigerator and freezer and finally we will wrap up with the pantry and food storage.
So let’s kick off our kitchen cleaning this week with those dreaded deep, dark cabinets.

Project #8: Kitchen Cabinets and Drawers
Depending on how many cabinets and drawers you have, you may wish to divide this up over several days if you don’t have that much time to get them all in one setting. Also since we will be tackling the pantry and food storage areas in a few weeks, if you have a cabinet that serves as pantry, skip it until we get to that week.
- Gather your materials. For items you are getting rid of, you will want some cardboard boxes so you can easily transfer them to the donation center after your purge your cabinets. You will also want some rags, soap and cleaner safe for your cabinets and a cleaning bucket to store the warm, soapy water.
- If you are tackling all of your cabinets and drawers in one session, empty all of them and place the belongings on your cabinet or table to sort through.
- If you are doing one cabinet or drawer at a time, empty it out completely and sort through, then clean the inside of the cabinet or drawer before you place the items back inside.
- Sort through the items in your cabinets. Make three piles, items to keep, items to donate and items to throw away. Get rid of anything that is broken, doesn’t work or is in poor condition. Donate items that you don’t use or need but are still in good working condition.
- Be selective about what you are keeping. Do you use it regularly? Or at least a few times a year? Do you have duplicates? Do all of your storage containers have the correct lids? How many place settings, cups and silverware settings do you really need? Think through how you use your pots, pans, cooking utensils and kitchen gadgets.
- Clean it. Once the cabinet or drawer is empty, use warm, soapy water to wipe out the inside and outside of the cabinet.
- Once the cabinets are clean and dry, begin putting your kitchen ware back inside. Think about how your cabinets are organized. Are you most frequently used items in easy to reach places. Can your kids reach certain items? If you want to rearrange where you store certain kitchen items, now is the time to do it. Keep items you only use seasonally in higher up shelves.
- Donate. Place the items you are donating in cardboard box and immediately place in your car to drop off at the nearest donation center or schedule a charitable pick up.
My Progress and Results
I did a cabinet purging about two years ago during my “nesting” phase so I didn’t have a whole lot of stuff to get rid of mainly because I haven’t brought that much back into the kitchen. The biggest culprit was baby dishes, bottles and utensils. I really gave the “kid cabinet” (which houses all of the kid’s dishes and medicines a good purging to get rid of most of those items since my older two now eat off of regular plates with us.

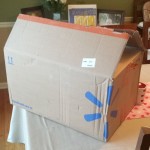
I was able to fill a box with random kitchen items and a few other odds and ends. It felt so nice to drop that box off at our neighborhood thrift shop (I think I’m spoiled because there are two really nice thrift stores both within walking distance of my house!). Every time I drop off a box, I feel so accomplished! This year long project is doing well for not only my house but also for me too! 

A New Project for a New Week
Each week I’ll share a new challenge to help us tackle one small area of our homes.
Some weeks it might be a deep cleaning task, some weeks it might be a decluttering task, some weeks it might be a challenge to help you create a space you love, and some weeks it might be a combination of a few different challenges.
The goal for the 52-Week Home Project is to have a home that is not only more organized but also runs with more purpose and intention and just feels more peaceful and calm.
The Next Project
We are spending a few weeks really hitting the kitchen hard through purging and deep cleaning. This week we will clear off, organize and clean the kitchen counters and sink area.
I don’t know about your house but our kitchen counters are a magnet for all. the. things! School papers, random toys, coupons, and other odds and ends just naturally accumulate for some reason on our counters. On top of that, between a few small appliances, decorative plates and food, I’m a little tired of all the clutter!
Are you in the same boat?
Well the good news is this week we are hitting those counters hard! So roll those sleeves up, gather a box (or two) and get ready to purge, clean and clear off those counters!
Project #9: Kitchen Counters & Sink Area
- Gather your materials. For items you are getting rid of, you will want some cardboard boxes so you can easily transfer them to the donation center after your clear the counters. You will also want some rags, soap and cleaner safe for your counters and sink.
- Clear off everything. Remove every single item from your counter and sink area. Store those items on your kitchen or dining room table while you clean the counters.
- Clean, clean, clean. With empty counter tops, give them the deep cleaning they desperatly need. Using a cleaner safe for your counter tops (each material requires different care so double check your manufacturer warranty), scrub off all the gunk and grime. If it’s time to reseal your countertops, this would be the perfect time to do it while they are empty. Don’t forget to tackle the backsplash too!
- Clean the sink. You would think the sink (which cleans our dishes) would be pretty clean but upon deeper inspection you will find a fine layer of grime just ready to be cleaned. Just like your counter tops, use a cleaner that is safe for your sink, Most sinks are usually stainless steel or ceramic but do check. To clean the garbage disposal and sink drain I like to pour a bit of vinegar over baking soda flushed with hot water. My kids LOVE watching the fizz!
- Purge, Purge, Purge! After the counters are clean, go through the items you removed from the countertops. Are their items you can get rid off? Items that need to be returned to their proper home? Kitchen appliances and dishes that can be stored away instead of on the counter? Carefully examine every item and be super selective about what you place back on your counters.
- Clean again. Once you have sorted through your items, give them a quick cleaning before you put them away. Dust and food easily collect on items left out on counters, coffee pots usually have some spare coffee grounds collecting in the crevices and toasters are notorious for bread crumbs. Give them a good cleaning.
- Evaluate your counter space. What do you really need out on your counters? Unless you have a spacious kitchen, counter space is precious so be really selective about what you keep out.
- Don’t forget the table area. After you have cleaned and organized your counters, don’t forget to give your kitchen table another quick clean. I know we set the table a few weeks ago but just like counters, kitchen tables are magnets for collecting stuff too.
Next Sunday I’ll share my progress as well as give our next challenge in the 52-Week Home Project so be sure to stay tuned.
Missed a project in the 52-Week Home Project? Head here to see the complete list of all 52 projects!
How did you do with your 52-Week Home Project this wee? Share your results in the comments below, including a link to your blog post or photo you shared on Instagram, Facebook or Twitter with the hashtags #The52WeekHomeProject


The post Organizing Kitchen Cabinets & Drawers appeared first on Creative Home Keeper.